This section guides you through creating your SanitizeEmail account, verifying your email, logging in, and understanding your dashboard for the first time.
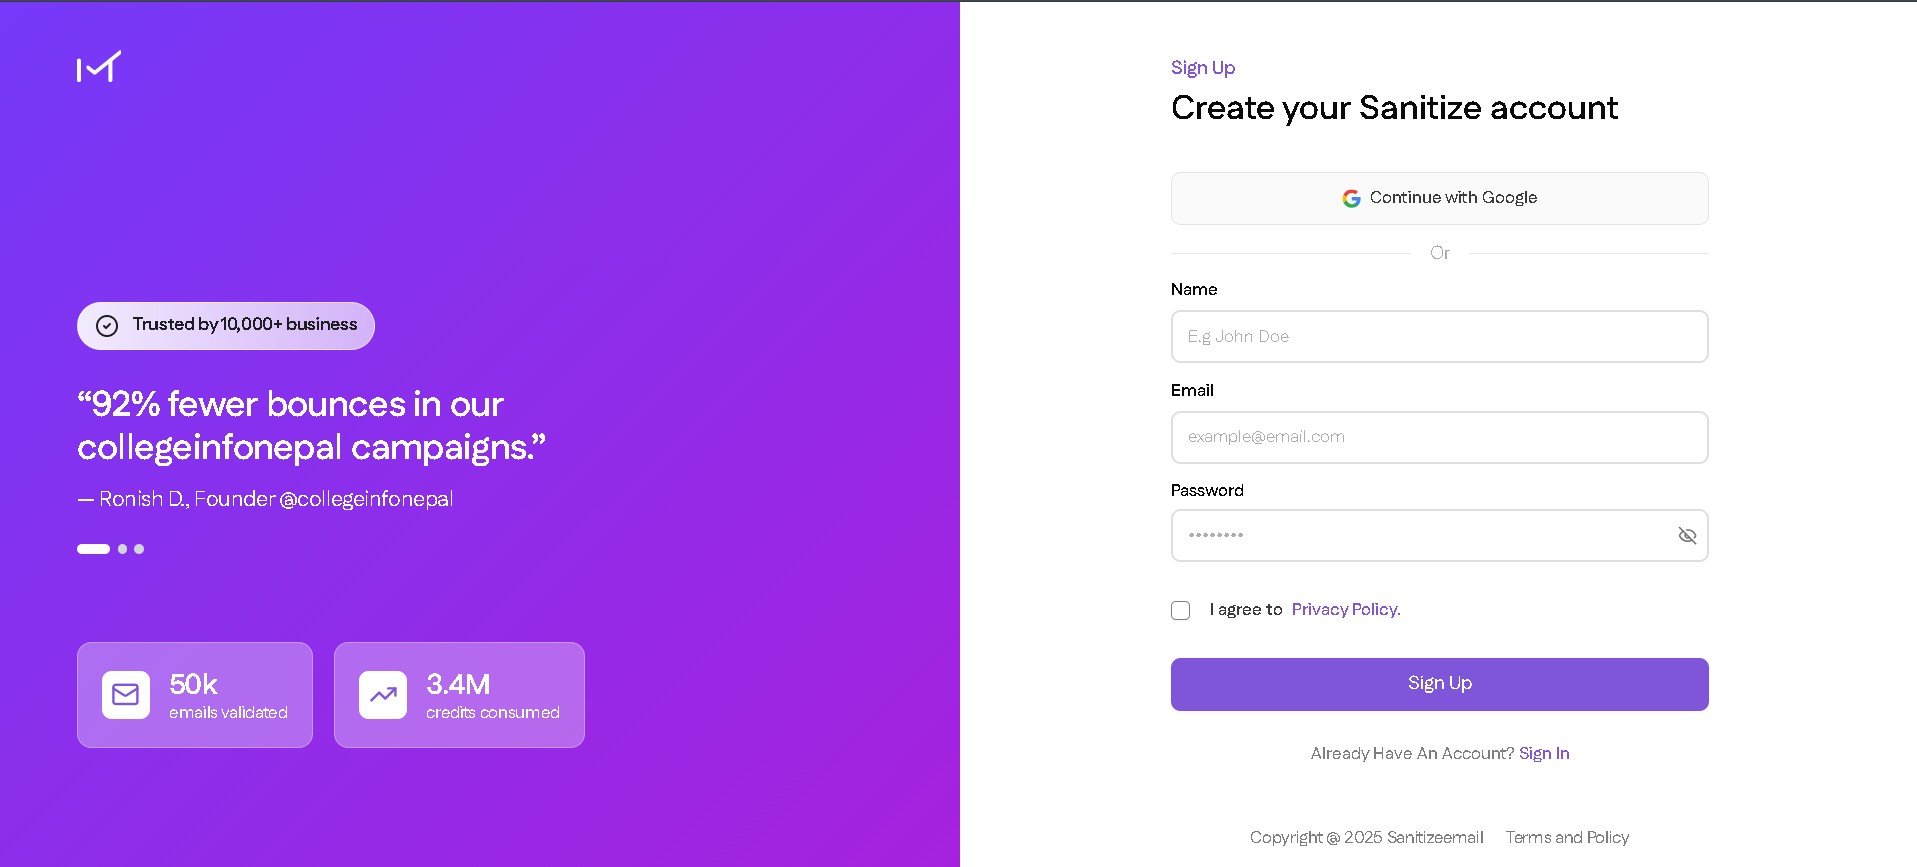
Step 1: Create Your Account
Go to the SanitizeEmail website.
Click Sign Up.
Fill in the required details:
Agree to the Terms and Privacy Policy.
Click Create Account.
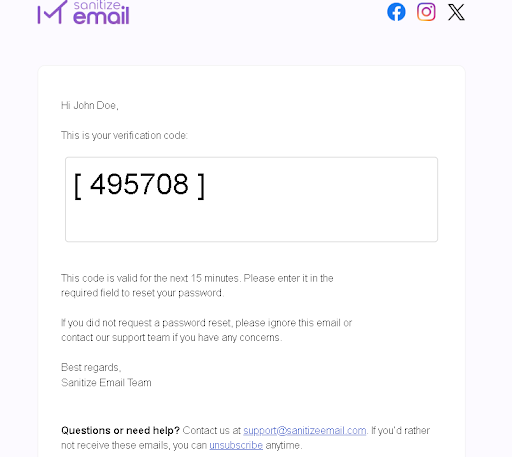
Step 2: Verify Your Email
After creating your account, you will receive a verification email.
Open your inbox.
Look for the email from SanitizeEmail.
A verification code provided to you in the email.
Step 3: Log In to Your Dashboard
Return to the SanitizeEmail website.
Enter the verification code from your mail.
Your account will be activated once the verification is complete.
You will be directed to your dashboard.
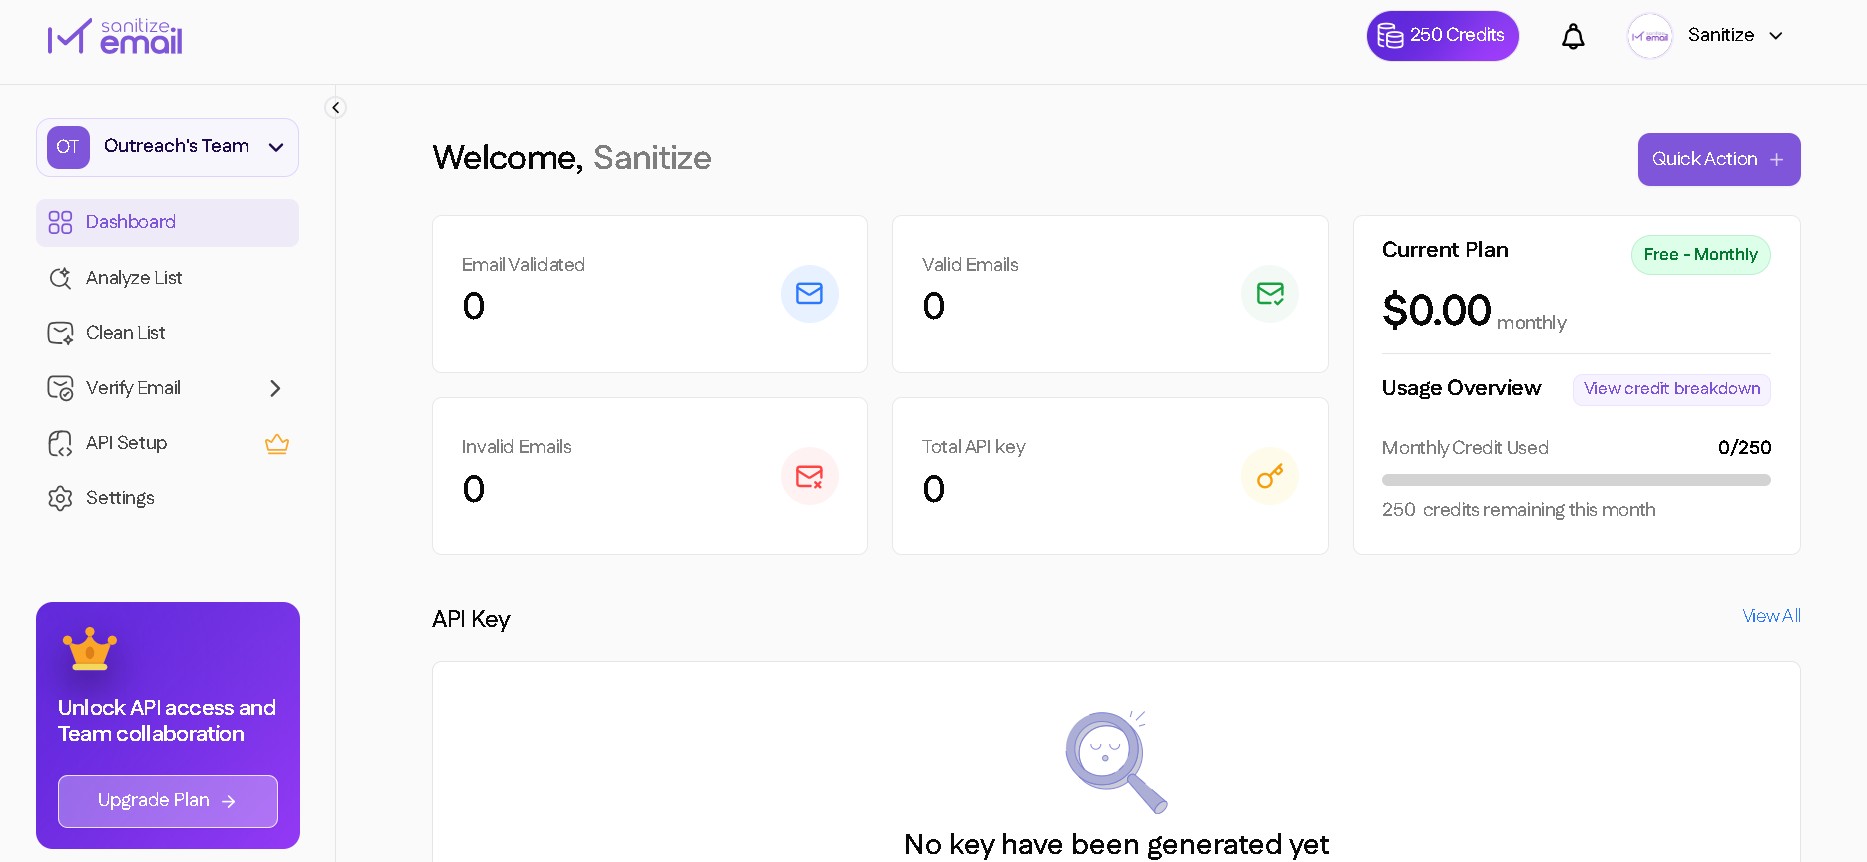
Step 4: First Time Dashboard Walkthrough
When you log in for the first time, you will see the main dashboard. This is where you manage all your email verification activities.
Dashboard Overview
Credits balance
Quick access to Clean List, Analyze List, and Email Verification and Validation
Upload panel for file validation
Recent activity, such as completed validations
Navigation menu for API settings, billing, and account management
Team collaboration and selection
You will use this dashboard to start verifying emails, check results, manage your files, and access API documentation.